Dispatch - call reception
Call Distribution Screen
Description of the elements
- 1. User
- The name of the user (operator or dispatcher) connected to the dispatch system. This is the identification code that determines the user name displayed. This user name will also be displayed on the drivers' tablet.
- 2. company
- By default, the name of the company will be displayed. If the company also dispatches for another company, a drop-down menu allows you to switch from one company to another. Clicking on the company name in the header will have the same effect of switching between companies. If the phone system of the main company allows it, the right company will be displayed on the screen when taking a call.
- 3. company name
- Displays the name of the dispatched company. In the case where a company dispatches several intermediaries, the name of the correct company will be displayed when the call is answered.
- 4. Date and time
- The current date and time of the server.
- 5. Header line (ST, HRE, #CIV., Street, Post, #V)
- ST: Red System is not able to dispatch the call automatically, Pink manual call, Green / Black System is looking for a vehicle.
- HRE: time that the operator to enter the call in the system and press enter or F6.
- #CIV: Civic number of an address. Commonly known as the door number.
- Street: name of the street, boulevard or highway.
- Post: the areas through which the call passes to be distributed to the cars.
- #V: number of the car that already has the call assigned when it is a callback or the call can be sent to a particular car manually.
5.1 Colored dots. The colored dots inside the call indicate the status of the call.
- 6. Last dispatched calls
- all calls dispatched to cars in service that have accepted their calls. By clicking on the small arrow to the right of dispatched calls, you can select or uncheck different options such as just calls, paratransit, public transportation, message, private message, question message and completed call. There are different colors associated with distributed calls.
- Blue: call received, driver must accept or decline.
- Red: call accepted.
- Purple: call refused.
- Black: call received but tablet closed.
- Red-orange: accepted call forced with protection by the dispatch. This is used when a tablet loses its connection or when the tablet is rebooted. The dispatcher can put a protection on the call that will be sent to the tablet when it reopens.
- 7. Functions (F1 - F12)
- They have several functions, sometimes different depending on the call acceptance screen or the dispatch screen.
![]() : In the call screen it is used to force a manual call that the address is not in the database. In the dispatch screen it is used to see where a particular car is and the
and the status of its call. Is it in direction or call completed.
: In the call screen it is used to force a manual call that the address is not in the database. In the dispatch screen it is used to see where a particular car is and the
and the status of its call. Is it in direction or call completed.
![]() : Call Pickup Screen: Used to view the list of recent phone numbers, approximately the last 10. Dispatch: Used to view the details of a call waiting in the dispatch screen.
: Call Pickup Screen: Used to view the list of recent phone numbers, approximately the last 10. Dispatch: Used to view the details of a call waiting in the dispatch screen.
![]() : Call Screen: None. Dispatch: Usually used in the very busy periods of the morning, late afternoon and the one of 3 am. This activates the rush mode. Specifically it makes your calls change zones. Instead of having 3 zones or searching for a car there will be only one. Your cars will avoid driving several kilometers when there are several calls waiting. Depending on the company and the number of cars present, this can be activated with three, four, five or more calls on hold.
: Call Screen: None. Dispatch: Usually used in the very busy periods of the morning, late afternoon and the one of 3 am. This activates the rush mode. Specifically it makes your calls change zones. Instead of having 3 zones or searching for a car there will be only one. Your cars will avoid driving several kilometers when there are several calls waiting. Depending on the company and the number of cars present, this can be activated with three, four, five or more calls on hold.
![]() : Both sides have the same function. One time F4 will take you back to your personal options. Twice in a row will log you out of the program.
: Both sides have the same function. One time F4 will take you back to your personal options. Twice in a row will log you out of the program.
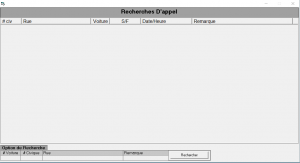
![]() : Call search menu. You can search by car, address, suitable transport numbers or remarks and comments. You can also see all calls of the day and more by left-clicking on date/time and left-clicking on search. See also Call information
: Call search menu. You can search by car, address, suitable transport numbers or remarks and comments. You can also see all calls of the day and more by left-clicking on date/time and left-clicking on search. See also Call information
![]() : In the call screen, F6 is used to send a call. You can also use enter twice. In some companies the F6 in the dispatch screen will open the accounts that the company they serve.
: In the call screen, F6 is used to send a call. You can also use enter twice. In some companies the F6 in the dispatch screen will open the accounts that the company they serve.
![]() : When a customer calls back to find out where his cab is, the F7 key is used to generate a callback. The call will appear in the dispatch screen in yellow. When the customer uses the same address shortly after the first call for a second person, it is best to use the regular formula and specify that it is for another person.
: When a customer calls back to find out where his cab is, the F7 key is used to generate a callback. The call will appear in the dispatch screen in yellow. When the customer uses the same address shortly after the first call for a second person, it is best to use the regular formula and specify that it is for another person.
![]() : Canceling a call. When a customer calls back to cancel his cab request, the operator who presses F8 will send the call to the dispatcher's screen and will be in red meaning that it is cancelled and to notify the car by sending the cancellation in his tablet. *F9: priority call. The call can be sent to the dispatch screen as a priority call with different delays depending on the priority of the call and it will be green on the dispatch screen. You can also display the car display board with F9 if you are in the dispatch screen.
: Canceling a call. When a customer calls back to cancel his cab request, the operator who presses F8 will send the call to the dispatcher's screen and will be in red meaning that it is cancelled and to notify the car by sending the cancellation in his tablet. *F9: priority call. The call can be sent to the dispatch screen as a priority call with different delays depending on the priority of the call and it will be green on the dispatch screen. You can also display the car display board with F9 if you are in the dispatch screen.
![]() : This is used to activate the hook table via the dispatch screen when it is closed. It is also used in some companies to put a priority on a call using a table of predefined priorities. Ex. Reservations for such and such a place according to the company's contracts.
: This is used to activate the hook table via the dispatch screen when it is closed. It is also used in some companies to put a priority on a call using a table of predefined priorities. Ex. Reservations for such and such a place according to the company's contracts.
![]() : It is used to change the screen either from call taking to dispatch or vice versa.
: It is used to change the screen either from call taking to dispatch or vice versa.
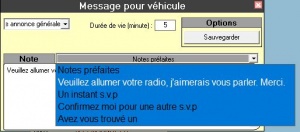
![]() : Send a message to a specific driver. Is done on both screens.
: Send a message to a specific driver. Is done on both screens.
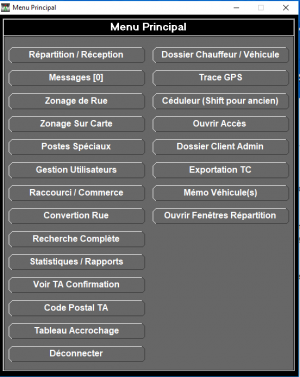
![]() : Drop down menu with 16 different options. You can find everything related to adapted transportation. For those who are with Moctel your infotel is there too. For those who work with access and Giro, your task manager is also there. There is also an option that is used during rush periods to send messages between employees to communicate information between them.
: Drop down menu with 16 different options. You can find everything related to adapted transportation. For those who are with Moctel your infotel is there too. For those who work with access and Giro, your task manager is also there. There is also an option that is used during rush periods to send messages between employees to communicate information between them.
Inbound Call Screen
The call reception is the tool with which you will take calls. It is very detailed in order to integrate the maximum of information possible. If desired, you can also use only some of the boxes. You will see as you go along the mandatory boxes and those that are complementary. Here is a screenshot of the page receiving calls.
At the beginning of the screen, the header, you have the basic information that you will find on both sides, i.e. on the receiving and dispatching sides.
- User: name of the person who works on the workstation
- Workstation: number of the workstation.
- Company name: name of your company.
- Date and time: these are the dates and times of the general Fraxion system. It is usually in symbiosis with the time of the workstation.
- 10 Last addresses: When a customer calls, the system records the address. When the customer calls regularly the system will remember the 10 most frequent addresses that the customer has given to the operator.
Then you have the central part.
- Date and time: this is the time you receive the call and/or make a reservation.
- Civic number: the number of the door of the house or building.
- Street: name of the street or business with or without F2
- City: name of the city
- Apt #: apartment number
- Number of vehicle:(1) Usually it is one unless the call requires several cars in a group where a customer and a car are brought back.
- Zoning: it is the stations or zones where the system will look for a car in order to fill the call as soon as possible.
- Destination: the place where the customer will be dropped off.
- Blocking: where to register the cars blocked for this address.
- Edit blocking: edit the blocked cars.
- Perm note: permanent note where to enter a comment in the file that will always be there and that you can not change unless you have access to it.
- Admin note: administrative note reserved for the administration and/or those who have access to it.
- Phone: it is imperative that the cursor is at the end of the phone line because otherwise you will not have access to the coordinates of the person who calls. Whether it is for addresses, customer specific information or certain advanced functions for those who work with Moctel and Fraxion.
- Note: any remark related to the customer, the address or useful to the driver in a temporary way is entered in the remark using the dispatcher/telephone operator. You can enter several lines, the driver can go down in the message to read them all.
1-These lines are mandatory. The others are optional.
- F1: In this function the key F1 can be used to force an address. Example you enter a street and the system does not find it you can do F1 and that will make the cursor go to the city line.
- F2: This function is used to search for a street, business or tourist attraction.


